Common Brazing Mistakes and How to Avoid Them
By Ozzie Cejas, Harris Products Group
While soldering is the most common technique used to join pipes in plumbing applications, brazing is the best choice for high-pressure piping because a brazed joint has typically up to five times the mechanical strength of a soldered joint. Brazing is also preferred for joining dissimilar metals such as ferrous and non-ferrous base materials.
Brazing is a straightforward, six-step process for joining pipes. Each step is relatively simple, but skipping any one of the steps can undermine the entire project. Here are some of the most common mistakes observed in plumbing and HVACR applications, and how to prevent them so that every brazed joint will be strong.
Mistake #1: Wrong amount of clearance
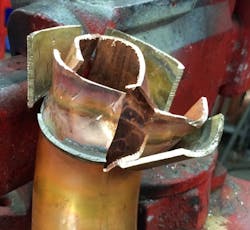
Too small of a clearance reduces the ability of a filler metal to flow properly. A wide clearance does not permit a filler metal to accumulate and fill the unoccupied space, causing filler metals to crack under stress or vibration.
The highest strength is created between the .002 - .005” range. Once you surpass the .005” clearance, strength drops off drastically. Although the joint may hold initially, the longevity of the joint will be significantly reduced.
Note: Technicians typically do not carry micrometers to measure the gap clearance. A rule of thumb is if it takes significant pressure such as using a mallet to fit the tubes together, the clearance is too small. And if the male tube feels too loose, the clearance is too large.
Mistake #2: Dirty pipe surface
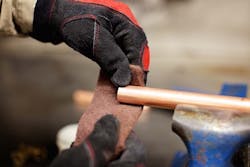
First, remove oil and grease by wiping the parts with a suitable degreasing solvent. Then etch the surface using a mesh cloth, sand cloth or wire brush on all areas to be joined, including inside the fitting. This removes oxidation and breaks the surface tension of the metal being brazed. Clean both parts one fourth inch past the area of the metals to be joined.
Finally, remove small foreign particles such as emery dust by wiping with a clean, dry cloth.
Mistake #3: Forgetting to apply flux
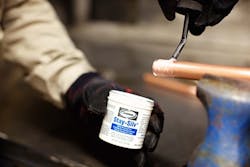
Only after cleaning should flux be applied to the part. During flux application, to prevent excess residue, apply a thin layer to only the male tubing. Insert the tube into the fitting and, if possible, rotate the fitting once or twice on the tube to ensure uniform coverage.
Flux should be placed about ¼” from the bottom of the tube; this allows capillary action to move the flux into the joint.
Note: Flux is required for all brazing jobs. However, in some brazing alloys, the flux is contained within the alloy. Refer to the alloy manufacturer’s specifications to determine if adding flux is needed.
Mistake #4: Uneven heating
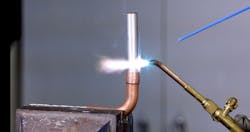
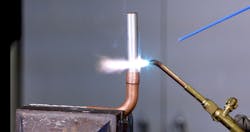
For most brazing jobs using oxygen-acetylene gases, a neutral flame should be used. It is important to avoid an oxidizing flame, as excess acetylene removes surface oxides from the copper. When this happens, the copper appears bright rather than having a dull or blackened surface. Review the manufacturer’s instruction manual to set the flame based upon the equipment you are using.
For filler metalalloys that contain flux, use the alloy toIf you are using alloys that require adding the flux, observing the flux as it goes through physical changes will provide a good visual guide to determine when the metal is up to brazing temperature. While heating the tube, flux starts to bubble and becomes completely fluid and transparent, indicating the parts are at brazing temperature. The brazing alloy melts very shortly after the flux stops bubbling. The transition to fluid and clear is the time to add the brazing alloy to your joint.
Proper heating steps:
- Begin heating the tube by applying the flame perpendicular to a point just adjacent to the fitting, moving the flame and heating completely around the tube.
- Move to the fitting, still holding the flame at a 90-degree angle and work around the fitting.
- Watch the flux changes to indicate when it is time to apply the alloy. The alloy can be touched to the tube to see if the joint is up to brazing temperature. Remember that the heat of the base metals—not the heat of the flame—should melt the alloy.
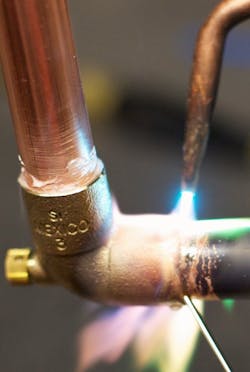
- After the base metals have been heated to brazing temperatures, move the flame to the joint between tube and fitting and apply filler metal. Move the flame over both parts as the braze alloy is drawn into the joint via capillary action.
- Sweep the flame back and forth along the axis of the assembled joint. The heat draws the alloy into the joint and completely fills the unoccupied joint space.
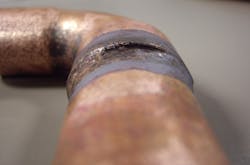
The key to successful brazing is having all parts of the joint evenly heated and up to brazing temperature before applying the alloy.
Mistake #5: Flux residue is left on the pipe
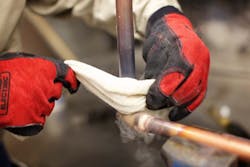
Immediately after the brazing alloy has set, quench with water, or apply a wet cloth to crack and remove the flux residue. Use an emery cloth or a wire brush, if necessary.
Getting brazing help
Both new and experienced plumbers will benefit from reminders on the steps to brazing. More information on brazing is available at www.harrisproductsgroup.com.
In-person training is also available for customers working with Harris distributors and wholesalers.
Ozzie Cejas is Technical Sales Specialist at Harris Products Group. Harris is the only company that manufacturers not only alloys and solders but also a complete line of equipment including oxyfuel torches and torch kits, air fuel torches, and accessories. HarrisProductsGroup.com.
