Old School Radiant Madness – Copper, Brass, and Iron (but No Plastic)
As I said in our last story, I love working with copper pipes and fittings and circulators and valves. I also love modern advances as they are often real improvements over old school approaches. Some great examples are PEX tubing and PEX fittings.
Old school projects are fun as they can be quite challenging. And very expensive!
But the homeowner on this old school radiant project went off the deep end! Her directive was to use no plastic (or as little as possible) inside the building.
As we proceeded through this project we noted lots of loopholes and exceptions being made for various subs based on code requirements. The electrician ended up wiring the house in MC cable instead of Romex. But there was no way to source asphalt and cotton insulation for the wire conductors! So all of the wire conductors had plastic insulation on them. Likewise, the switches and receptacles would be made of plastic and would be installed throughout the house.
For us, we were directed to design and install a radiant system made as much as possible with copper, brass, and iron. No plastic anywhere. Even buried in the floors! For the air side, we were directed to install stainless steel duct with clean outs between every other joint. (We didn’t tell anyone about the plastic gaskets between duct sections!)
Radiant Design Considerations Using Copper Loops
Unless you are Rip Van Winkle and just woke up and haven’t heard of PEX tubing, no one uses malleable iron pipe or copper tubing anymore for radiant loops. It isn’t economical or easy to install. I have quite a few radiant installation guides from the 1940s in which they show how to bury welded iron pipe or soldered copper tubing in ceiling plaster or concrete floors—it sure looked difficult and unforgiving to install and repair.
To create a copper tubing radiant system for this project, we used our PEX loop design software and made some educated guesses to convert from PEX tubing to soft copper tubing. Based on the pressure drop of ½” PEX, we determined that we could use either 5/16” OD or ½” OD soft copper tubing and keep the loop lengths reasonable.
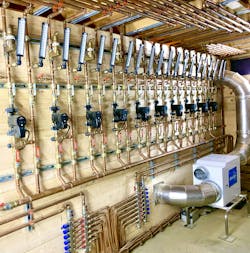
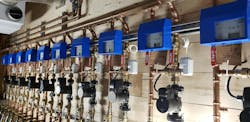
Because going plastic-free wasn’t enough, the homeowner also wanted seventeen separate radiant mix temperatures for complete flexibility. So, we broke up the house into 17 zones, each with a pump station and electronic (plastic again!) mixing control, thermostat, and outside sensors. We were able to get our plastic-coated control wiring approved because we could not source the “organic free-range” kind.
Sourcing Radiant Copper Floor Plates and Loop Adapters for Radiant Manifolds
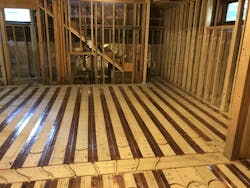
The homeowner wanted copper radiant floor plates as she had concerns about using aluminum plates in the house! It was a challenge, but we finally found a sheet metal shop that could both cut the copper floor plates and form the center groove to grip the copper tubing.
This meant that we would have two different types of copper plates—ones that worked with 5/16” OD copper and ones that worked with ½” OD copper. (Full disclosure—we did have to rip up a few copper plates because the guys mixed up the different types!) Having copper plates dictated using copper nails to install them onto the floors after the carpenter routed out all of the grooves.
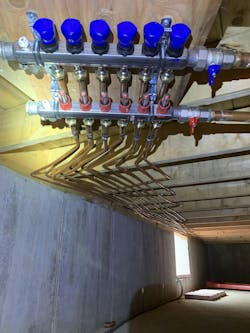
Because radiant manifolds are designed for use with PEX tubing, we had to figure out adapters and couplings to convert our soft copper tubing to ½” hard copper tube. We ended up brazing stubs onto the soft copper and then using compression fittings at the manifolds.
Installation Challenges
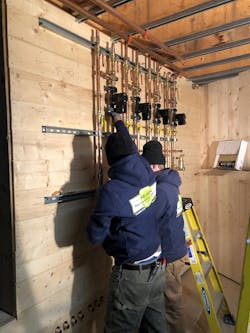
While one team was installing copper floor plates and carefully marking out our loop path, another team was working on installing the 17 pump stations. That proceeded nicely until we got busted by the representative of the homeowner—they had noticed the plastic inserts in the cushion clamps! We consulted with the contractor and we all agreed that it was more important to bend the “no plastic” rule and keep the cushion clamps—having the plastic cushion meant that the pipes could expand and contract quietly. After some trial and error, we determined that silver nail polish nicely camouflaged the black plastic cushion and made it look like it was made of metal. Problem solved!
Another challenge of this project was the constant redesign of room layout and shape—this resulted in ripping up copper floor plates and re-routing the copper loops to address changing loop lengths.
Copper Loop Misery
Anyone who has ever installed soft copper tubing knows that small diameters (like ¼” and 3/8”) are fun and easy to install. Large diameters (5/8” and up) can be a bear and are very easy to kink. Our teams found out how fickle ½” OD soft copper tubing could be—they were accustomed to working with PEX and how easy it was to move around and how difficult it was to kink.
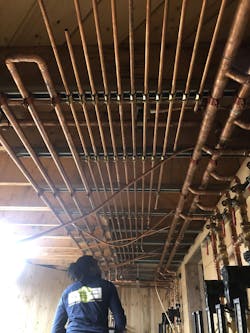
The ½” OD soft copper was a challenge to organize and snake through joists and stud bays—it quickly work-hardened and become more and more prone to kinking. It took us a bit to develop a knack for gently bending and fishing each copper loop with multiple techs through the framing to get to each manifold. We had to experiment with the locations of the remote manifolds in each zone to minimize the bends needed in the copper loops.
When we had to bring the copper loops into a mechanical room, we transitioned to hard copper tubing to make it look more presentable than a bundle (more like a tangle) of copper spaghetti.
Throughout the course of the project, we had to rip out quite a few copper loops due to a kink that developed after the copper loop had been fished through multiple holes to get to the manifold. Work hardening of the copper tubing also made it really challenging to get the copper loops to lay flat and look orderly.
Heat Source – Air to Water or Boiler
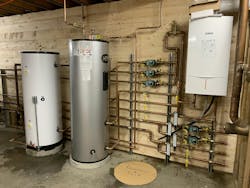
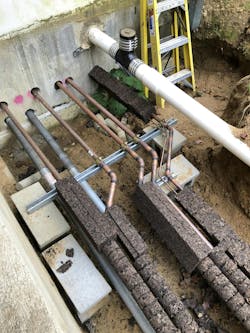
The project design started with using a condensing boiler and buffer tank to serve all 17 radiant zones. Halfway through the project, the homeowner decided to include two air to water heat pump as an alternate heat source. We cored through the foundation and ran our line sets outside as well as hot water supply and return pipes to the remote heat pumps. We then laughed as the contractor struggled with chunks of Spanish cork, carefully drilling and slicing sections to make pipe insulation! Even more nuts was the use of volcanic ash as insulation around the cork insulation.
Ductwork and Air Handler
We installed an air handler with hot and chilled water coils in the main mech room. The homeowner insisted on ductwork custom made of stainless steel. To ensure that every square inch of the ductwork could be scrubbed and sanitized, we had to install clean outs between every joint or change of direction.
Project Ground to a Halt
The project finally ground to a halt when the homeowner “ran out of money” (we suspected that the heirs hired a lawyer to look into the enormous expense of this fantasy project). We settled up our accounts and said we would be glad to return if the money spigot got re-opened! It was an interesting time and materials experience for us—one that we would most likely never repeat!
About the Author
Brian Nelson
Brian Nelson is the co-owner of Nelson Mechanical Design, a “green” mechanical contractor serving the energy efficiency and home comfort needs of Martha's Vineyard, MA since 2004. The company designs, installs, and services just about anything to do with heating, cooling, domestic hot water, water treatment, geothermal, heat pumps, and radiant. NMD is committed to preserving the fabric of the Island it calls home. To learn more visit nmdgreen.com.

