MARTHA’S VINEYARD, MA — We were asked to “rescue” a radiant floor heating system in a large Vineyard home—but this rescue came with a challenge—the new finished floor would be “floating” above the radiant panels.
The 15,000 square foot home was built 20 years ago with reclaimed hardwood floors (refinished wide barn boards from 1800). The existing radiant system (several zones of PEX embedded in concrete underneath the hardwood floors) was only designed for floor warming. The homeowners disliked how “stiff” the floor felt. They wanted a “softer” and more springy-feeling floor, and they wanted a radiant system that could comfortably heat the home throughout the winter.
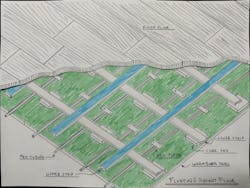
Floating Floor Model
After multiple discussions with the architect, the flooring experts, and the engineer, we arrived at a floor assembly that had the “springy-ness” that the homeowners were looking for. Cork pads would sit on Warmboard panels and a lattice of wood strips would sit on the cork pads. Then another lattice of wood strips would rest on the lower wood strips and the finish floor would rest on the upper lattice. To make sure that the “springy-ness” was consistent across the entire floor, all of the original hardwood floorboards from 1800 would be planed down to a ¼” thickness and then glued to spruce aircraft plywood. A 20-foot by 20-foot model of this floor assembly was built and the homeowners loved it.
Radiant Air Gap Challenge
But could we get the radiant assembly to work? And could we get the radiant assembly to heat the home on design day? All radiant assemblies that we could find in any literature involved radiant tubing conducting to a surface, and then the surface radiating heat into the living space. Nice and simple and well modeled and easy to duplicate.
Our challenge was to understand the heat transfer across the air gap between the Warmboard and the underside of the finish floor; the radiant tubing and Warmboard panels would radiate heat up to the underside of the finish floor and then the finish floor would warm up and radiate heat into the living space.
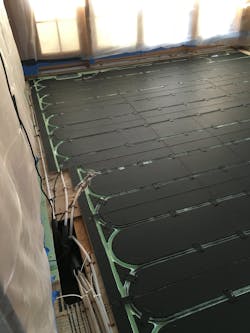
We found the heat transfer equations to model this process. The calculations showed that 130° F water in the tubing would provide sufficient radiant output across the air gap, warm up the underside of the finish floor, and end with an floor surface temperature of 85° F. To improve radiant heat transfer we planned to paint the Warmboard flat black as well as the underside of the finish floor.
Test of the Radiant Assembly
We built a test assembly of this radiant sandwich to confirm the output, and it worked just as expected… but then the Uponor PEX tubing starting popping out of the Warmboard channels! The Warmboard grooves were designed to hold the PEX tubing until a finish floor was laid on top—they weren’t designed to hold the tubes down in the middle of our air gap. We fixed this problem the plumber way; we ended up installing almost 5000 nail plates to hold the tubing into the Warmboard grooves!
Demo of the Existing System
Once the plan for the new floating radiant floor was solidified, we could move forward with the project. Movers removed all the household effects, carpenters removed all of the baseboard trim, and the flooring gurus labeled every floorboard so they could be planed down, glued to aircraft plywood, and then re-installed in precisely the same way as before. Once the finish floor was removed the contractor broke up the existing concrete pour with the old radiant tubing.
Existing System was Single Temperature Radiant for Floor Warming
The old radiant system was never really successful. There was not enough tubing installed in the floor, it was poorly zoned, and it was built around a fixed water temperature with manual mixing valves. Our new radiant system would feature more than enough radiant tubing, automatic temperature mixing, and an internet portal to view and adjust all zones.
Warmboard Installation
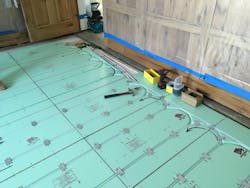
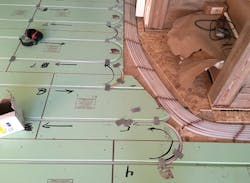
The folks at Warmboard drew up a detailed plan of the twenty-two zones and how to layout the panels. The carpenters installed the panels and routed custom grooves and access holes in the subfloor to help us get the radiant tubing from the first floor down to the basement mechanical rooms.
Uponor Pex Installation
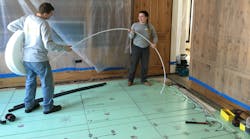
We then installed 6,000 feet of 1/2″ hePEX radiant tubing in the Warmboard radiant panel grooves. The tubing snapped in place and then we installed nail plates at one-foot increments to hold the tubing in place. The panels and tubing were then painted with flat black paint to increase the radiant heat transfer across the air gap between the Warmboard and the underside of the finish floor.
Because of the long tubing runs to get from the Warmboard panels to the remote basement manifolds, we had to run extra loops to keep our tubing lengths reasonable.
Because the basement level below was finished, we had to open up the subfloor at various points across the first floor level to create access points through which to snake our PEX tubing.
Finding ways to snake the radiant tubing between the 1st floor and the basement finished ceiling was challenging but we managed to get all 6,000 feet successfully routed to three different mechanical rooms in the basement level.
Where we couldn’t get access across in the void above the basement ceiling, we carefully went across the 1st floor level with the radiant tubing—aware of balancing our flows so that we did not create hot spots.
Air and Floor Sensors
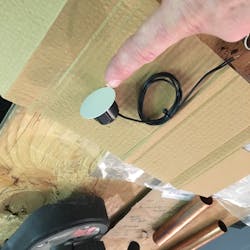
We also installed air sensors in the 1st floor rooms to measure the local air temperature—some rooms were already wired for these sensors so we epoxied our new sensors to the backing plate.
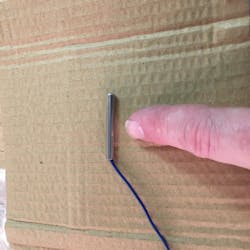
We also installed floor sensors in the Warmboard radiant panel and in the finish floor layer above it. This gave us a good sense of how effective our heat transfer was between layers.
For the rooms that did not have wires already run in the walls we had to find an innovative, robust, yet inexpensive solution. We installed BAPI wireless transmitting sensors in the rooms with no control wires and were able to transmit the temperature information from the room to the basement mechanical spaces. Each receiver had a LED indicator to tell us that transmission between the sensor and the basement receivers was successful.
Finish Floor Installation
Once we were done with our tubing, nail plates, painting, and sensors, the flooring contractor laid out the cork pads, the lower lattice of wood strips, the upper lattice of wood strips, and then the hardwood finish floor. Because all of the floorboards had been numbered, they were reinstalled in exactly the same way as they had been before. Careful maps had been drawn of the furniture locations so that wood blocking could be installed where seats and sofas and tables would go. Even the toilets and the piano got wood blocking so they wouldn’t sag or bounce on the new finish floor.
Radiant Zones and Thermostats
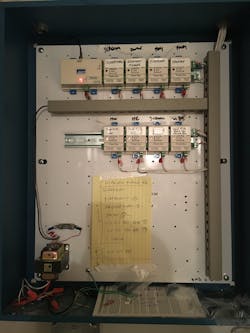
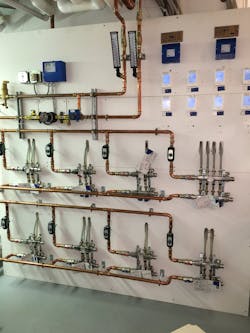
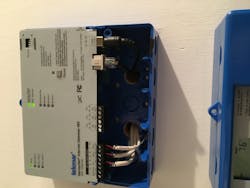
Because the homeowner wanted a clean installation, all 22 Tekmar radiant zone thermostats were located adjacent to their particular Uponor radiant manifold in the three mechanical spaces. The thermostats looked at room air temperature and floor temperature to determine when to open and close the correct Taco Sentry zone valve.
We installed new piping from the boiler room to each of the remote mechanical rooms and installed separate closely spaced tees and air separators on each radiant manifold group. This eliminated air purging issues and made the system quiet and low maintenance.
To automate the radiant floor water temperature, we installed motorized mixing valves for each manifold group. This ensured that the radiant floor system would get the correct water temperature no matter what the outside temperature was.
We used the Bell and Gossett variable speed ECM style circulator pumps to make sure that we were only pumping the correct amount of hot water to each radiant zone. This saved money and helped to prevent over and under-heating of the rooms.
Lastly, we installed the internet gateway to permit monitoring of all 22 radiant thermostats and adjustment of setpoints for each room. Now the entire radiant system was under supervision and control via the internet to the homeowner’s iPad or iPhone.
Winter Operation
We ran the new floating floor radiant system through the winter and were happy to find that we could comfortably heat the home with 125° F water on the coldest days. And the homeowners loved the “springy” floors.


